Introduction
I personally love the fundamental moves. I think all the other movements are based on only a few movements, one of which is the squat. There’s many ways to do squat workouts but the foundations remain the same, as do the targeted muscles.
You know the squat by its ability to build your booty, and nowadays, a big butt is all the rage. The great thing about the squat, though, is how it does not only work the butt (or your glutes). Every time you do the movement, you’ll find that your entire lower body is getting a workout. Judge it by how your legs shake. This is not an easy movement!
You’ll find, though, that the first few reps are okay. You might be able to do 5 in a row. But then, you feel the ache. You feel the burn.
And gradually, your back starts to arch. You start to feel your knees move forward just a tad bit too much. Your chest starts dropping to the floor in an attempt to make the squat easier.
These are the signs of a bad squat form. Don’t worry if you’ve noticed these signs with yourself; we’ve all done it. In noticing your mistakes, you are already on your way to correcting them.
Luckily for you, I have gone through these mistakes already. I still sometimes do make these mistakes, especially if my weights are too heavy! Here’s some tips for you to help correct your form!
The Basic Squat
The squat is very simple at first glance, but it becomes increasingly hard to keep the proper form as you increase your reps. You’ll know you’re doing the right form if you feel the pain in your glutes (or your butt).
1. Starting Position
Stand with your feet shoulder-width apart. Keep them flat on the floor all throughout the movement; some tend to lift their heels to compensate for the increasing ache, but this will target different muscles.
Your toes should be pointing straight forward or slightly outwards at a 45 degree angle. The important part, though, is that your toes should be aligned. That is, if we were to draw a line from the top of your left foot to your right foot, it should be a horizontal line.
Your hips should be aligned, too. Not many people notice that their stance tends to incline to the left or to the right even with their feet aligned. Because of our improper posture while sitting down at work or constantly standing on one foot’s weight all the time, our hips tend to favor one side.
An easy trick to make sure your hips are aligned is to squeeze your glutes in. This tends to correct your stance quickly.
Don’t forget to engage your core to keep your form stable! Bring out your chest and make sure it stays out all throughout the movement.
You can place your arms straight out in front of you to keep you balanced. Although beginners would probably be better off with this position, I personally like to clasp my hands in front of my chest.
Eyes forward, and here we go.
2. The Squat Movement
With your arms in front of you, bend your knees as if you were to sit on a chair. Be mindful that your knees do not go over your toes. The movement must be as if you were bending at the hips.
Keep your back straight but not arched. Engaging your core will help keep your back neutral. Your chest should also still be out as if a string were holding it up from above. You must also engage your glutes as you do this for a more effective workout.
Since you are imagining yourself sitting down on a chair, when your thighs are parallel to the floor, then you can stop and rise again to the starting position.
Progression Exercises
Some people might find that their legs, and more specifically their glutes, are strong enough to do a lot of reps without getting tired. This is why some people like to make their squats harder.
Although there are a lot of ways to increase the intensity of your exercise, I usually like to do this through three methods: increasing your weights, changing the movement slightly to make it harder, or combining both.
In this article, we’ll see how we can incorporate weights into our squat movements.
Adding Weights
Although some people avoid free weights in fear of bulking up, there really is nothing wrong with adding weights. The myth that weights will bulk you up is misleading, and it probably stems from the fact that bodybuilders show off their huge muscles.
Weights are nothing to be afraid of, however, and can even help you trim down fat if that’s your goal. Weightlifting is known to be an exercise that burns calories even after the workout is done.
This is because, in weightlifting, you create small tears in your muscles which your body would then work to recover and heal after your workout session.
If you’re only beginning, you might want to add weights in small amounts, and only in amounts that are most comfortable for you.
1. Dumbbell
The dumbbell is an essential equipment of any home gym. They are probably the most functional gym equipment I have at home since I can use them for virtually any exercise. The squat is no exception!
You might want to use a weight that is around 5 pounds each dumbbell and see how that feels for you. It’s really much better to go lighter than heavier before anything. Get accustomed to the feel of the dumbbell in your hands as you go down.
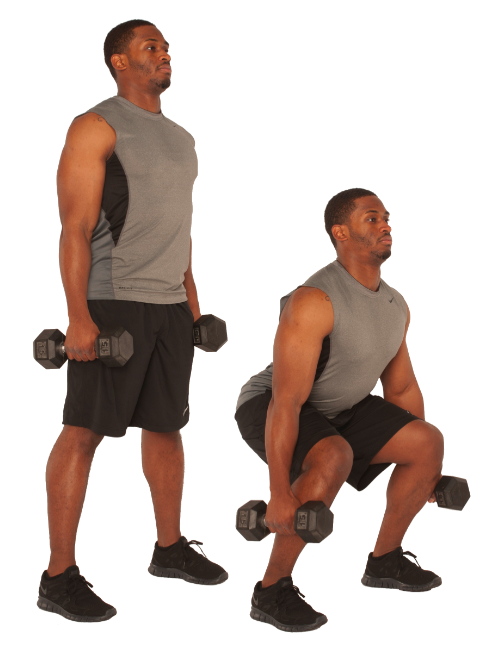
The easiest way to incorporate the dumbbell in the squat movement is to hold a dumbbell in each hand and place your arms by your sides, but not touching your hips or legs.
Do the normal squat movement this way, and you’ll find it a bit harder to keep your form.
If you find, though, that you have to compromise your form to be able to keep your dumbbell weights in, then you might want to lighten the weight. The most important thing in your movement is your form.

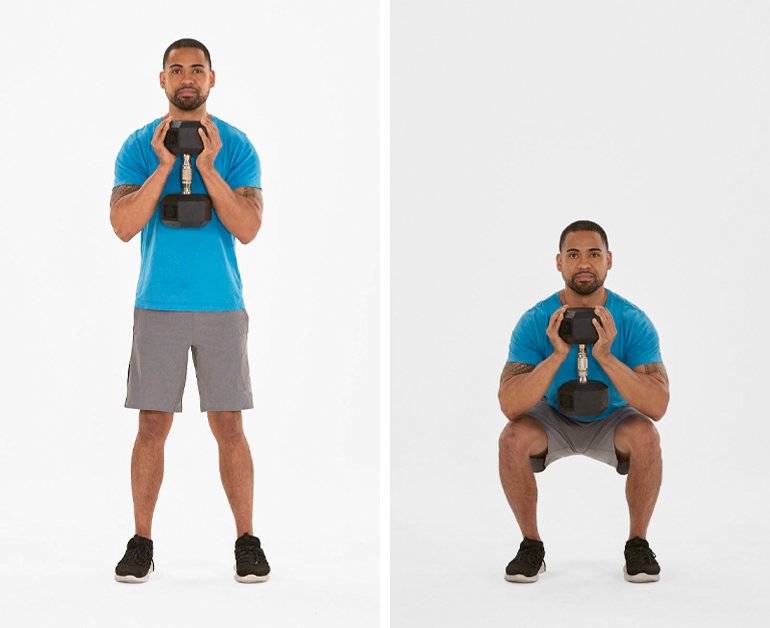
Others, like me, prefer to hold the dumbbell near their chest. This provides a bit more balance for me. Some call it the goblet squat!
Cup your dumbbell by its weight and not its bar, so that your hands are forming a goblet shape. Do the squat as you would normally.

2. Barbell
The barbell might be a bit more intimidating for some, but it’s a lot more satisfying to do. It really makes you feel like a bodybuilder with the bar at the back of your shoulders.
As a beginner, you might want to avoid any plates for now and start practicing with the bar first. This will give you a feel of the bar. Plus, the bar has actual weight, so this will intensify your exercise anyway.
If you have a rack where the bar rests, it’s much easier to load your bar on your back. Simply get under the bar until the bar rests on your shoulder blades and near your neck, with your hands on the bar.
Your hands must be bent at the elbow but still pointing downwards, almost as if your wingspan is flat and facing forward. Keep your feet flat on the ground.
Have the same stance as you would without the weights, with your core and glutes engaged, and chest facing forward.
Lift the barbell from the rack slightly just to unhook and step back. Then, do your squats as you normally would. Remember to keep your chest out and your back neutral. It’s much harder to think of these things when you have a barbell on your back.
If you don’t have a rack, though, you can still put the barbell safely on your back. Try to do this for lighter weights, though, as this is quite tricky.
Start in a deadlift position — your feet shoulder-width apart or wider if necessary, your hips and knees bent as if mid-squat, your arms gripping the bar, and your chest out. We won’t get into the details here, but those are the basics.
Then, push your legs to lift yourself up with the bar in your hands. Quickly push your hips forward and bring the bar to the front of your chest. This is a quick and explosive motion that brings the bar near your chest, with your arms facing forward.
Lift the bar above your head and rest it on your back. Some like to jump for extra momentum.
When you have the barbell safely on your shoulder blades, do the squat as you would without it.
Squats Training Video
If you’re looking for a more visual way to learn how to do squats properly, check out this great video by Bowflex on YouTube:
Conclusion
The squat is one of my favorite exercises and it might turn into yours, too. Squats really make you feel like you have much stronger legs! Don’t forget to cool down by doing some stretches; squats tend to cause DOMS or delayed-onset muscle soreness. There are a lot of exercises you can do to progress your squats even without weights!
Have fun, and smile through that pain in the butt! If you’re anything like me, and have bad knees, check out this post I did on knee sleeves for squats which can help you maintain your form and prevent injury. If you’ve just started your fitness journey at home check out the post we did on the home gym essentials that you can consider for your setup!

Marko Rakic is a trail runner and fitness enthusiast from Sydney, Australia. He is the lead writer for The Ultimate Primate and believes the best way to live a happy life is through constantly challenging yourself.
